Often repairing or restoring older guns can be a challenge when there are parts that are no longer offered by the manufacturer. In some cases the gun may even still be in manufacturer but the manufacturer does not offer the needed part for individual sale. Depending on the geometry of the part it may be a candidate for molding. Parts without internal voids or undercuts are prime candidates for molding. Looking at the part imagine a parting line in the middle of the part. If you can see how a mold could close and separate around the part it is likely a good candidate for a mold. Silicon molds are the easiest to make and work with for resin cast parts. Resin cast parts can usually replace any plastic pieces and in come cases metal parts also depending on the required strength and wear properties. I prefer to use Mold Max 60 by Smooth-On. It is harder than most other silicon mold materials and is heat resistant. It can be used to cast pewter as well as resins. It will also last longer than softer molds providing more parts for the life of the mold.
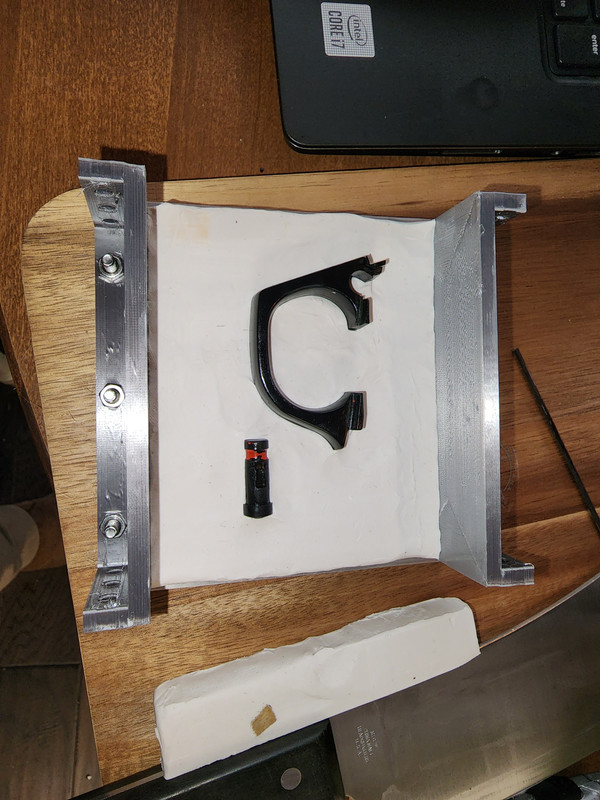
So the first thing needed to get started is a mold box. The mold box will be used to contain the part and liquid silicon while it cures around the part. A 3D printer is handy for making mold boxes. The box should be larger than the part and provide at least 1/2" clearance around the part. I prefer closer to an inch. That way there is plenty of room for registers in the mold. I printed the mold box in the image below. You'll notice it bolts together. The mold box needs to be disassembled during the mold making process so keep that in mind.
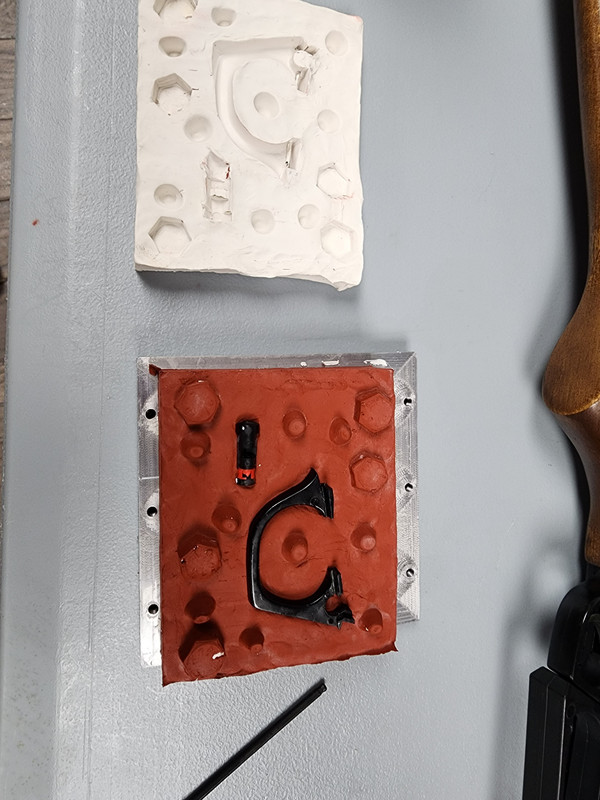
The next thing we will need is some modeling clay. The clay should be placed in the bottom of the mold box and be thick enough that one half of the part can be pressed down into the clay. Once the clay is placed in the mold box push the part into the clay and use your fingers and any other handy tools (popsicle stick, etc..) to move the clay tight up against the edges of the part so that the mold parting lines will be clean. Next take a hex head bolt and using the bolt head press it into the clay around the part. I stay far enough away from the part such that the clay is not pushed into the part. Also press indentions in the corners of the mold. I use a combination of bolt and the end of a sharpie marker to make registers. These voids in the clay will serve as registers for aligning the mold halves when it comes time to pour. You can also place small sticks (like cabob skewers) in the mold touching the part and sides of the box for pour and air vents. I simply drill pour and air vents in the mold after the mold is cured.

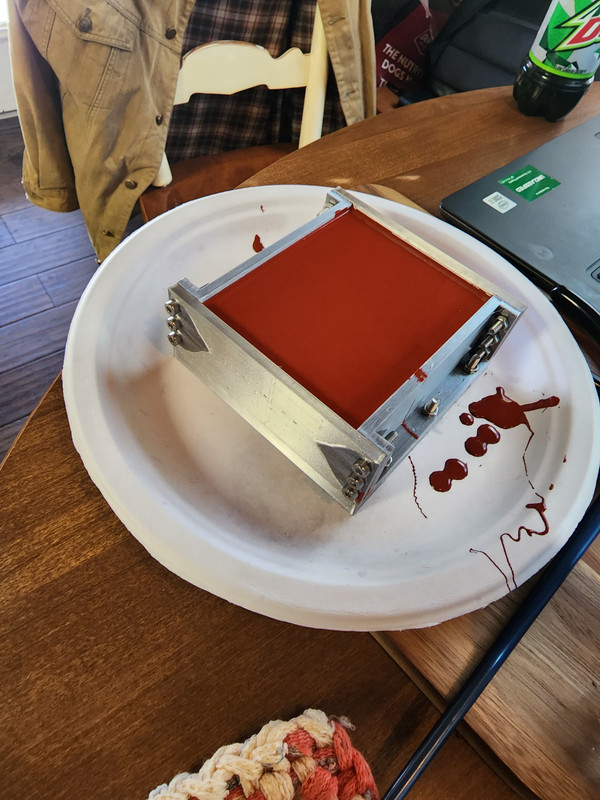
The next step is to spray the mold and part(s) with a mold release. I have used Mann Mold Release 200 with good success. Let the mold release dry for 15 to 20 minutes then prepare your mold material per the manufacturers instructions. Mold Max 60 requires some fairly precise weight measurements and is a bit more challenging to get the ratio correct. After preparing the silicon, slowly pour it into the mold box at a place where it will not contact the part. Allow the material to flow slowly into the mold box and surround the parts. Continue pouring until there is at least 1/2" of silicon covering the highest point of the part. Now its time to wait for the silicon to cure. Follow the manufacturers instructions. It would be terrible to ruin the mold by getting too anxious.

Now that the mold is cured we can disassemble the box and remove the mold and clay. Leave the part in the silicon mold half and carefully remove the clay from around the part and touching the mold.
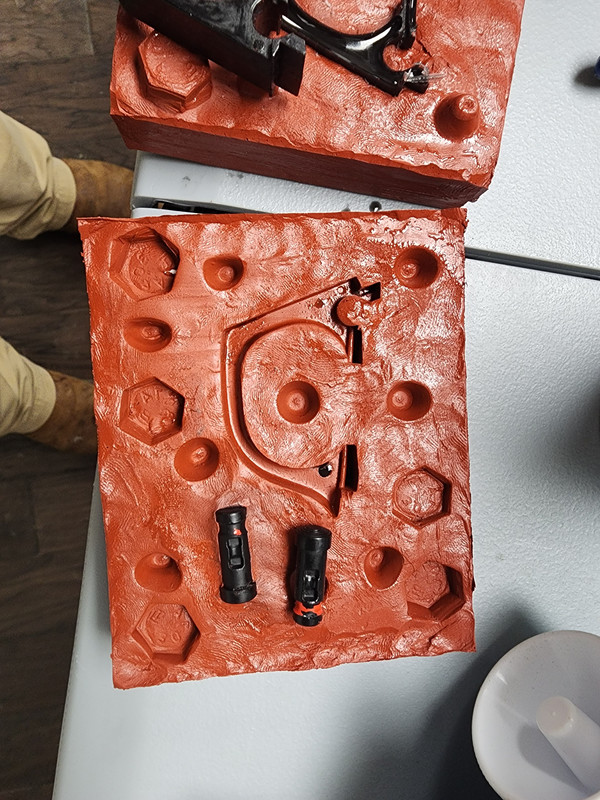
You can see in the image below where the mold filled the register impressions. Now that the clay has been removed and the part is still in the silicon mold half we will reassemble the box around the silicon mold and spray the silicon and part with release agent. We are basically repeating the previous step but instead of clay in the bottom of the mold box it is the first mold half.

So now that the second half of the mold has been poured we must wait for the cure time to pass. Once the mold is cured we disassemble the box and remove the mold. Pull the two mold halves apart carefully and remove the original part. If you did not mold in pour and air holes you can cut those in now. With Mold Max 60 it can be drilled, so I simply find the high points of the mold and drill pour and air vents. My first attempt at casting did not turn out great because I could not get enough resin in the mold. I started "injecting" the resin in with a syringe and it worked really good. There are many more tips, tricks, and aspects to molding such as using vacuum chambers to remove air from the resin, and pressure chambers for curing the part. There are many great videos on the subject over at youtube. I was able to make a mold and subsequently have made working parts from the mold.
I had never tried molding before and it was not stressful or difficult. I would encourage anyone interested to give it a try. Be sure to follow all precautions and warnings from material manufacturers.
